
Step 9: Preparing Eclipse
If you haven’t already, update your installation to include both the SDK Platform Android Honeycomb Preview and the GALAXY Tab add-on. To do this, go to the Android SDK and AVD Manager within Eclipse. On the Available Packages tab, find the Honeycomb Preview in the Android Repository list and the Samsung package within the Third party Add-ons list. The following figure shows what these look like. Install both of these items, as well as any pre-requisites they request.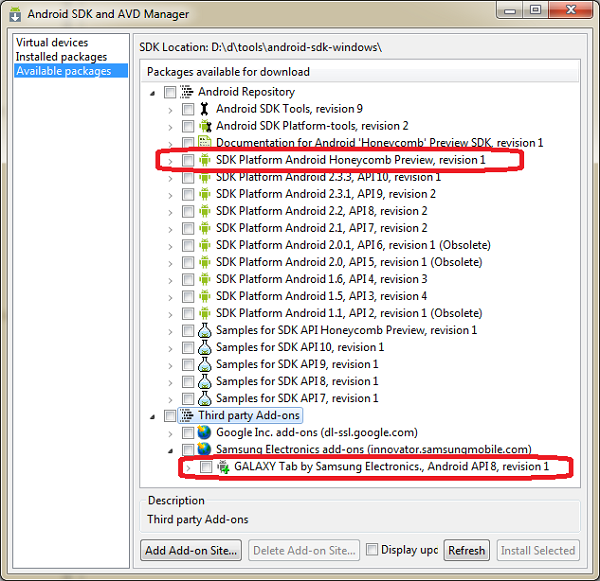
Step 10: Creating an AVD to Emulate the Samsung Galaxy Tab
The Samsung Galaxy Tab was the first official Android tablet with the Android Market. As such, it is a popular target device for developers looking to target tablet users. Interestingly, the Galaxy Tab is also the first third-party device to show up with additional development content within the Android SDK and AVD Manager. This makes it somewhat simpler to create an AVD for. Please note that these steps require that you install the items from Step 0.The important specs of this device, from an Emulator perspective, are:
- Target platform: Android 2.2, Galaxy Tab
- Screen Info: High Density, despite the fact that it’s not, this is what it reports, WSVGA (1024×600)
- No keyboard
- Has dual cameras
- Within Eclipse, launch the Android SDK and AVD Manager
- Select “Virtual Devices” from the left-hand options
- Click the “New” button to create a new AVD configuration
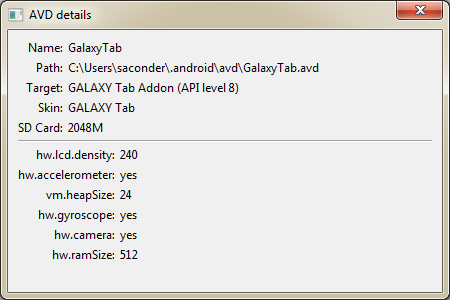
- Name the AVD: “GalaxyTab”
- Select the Target: “GALAXY Tab Addon (Samsung Electronics Co., Ltd.) – API Level 8”
- Input the SD Card Size: “2048 MiB” (or a suitable value for your uses)
- Keep the default Skin Details: “Default (GALAXY Tab)”
- Keep the default Hardware Property for Abstracted LCD Density: “240” (despite the real density being 170dpi)
- Also leave the rest of the default hardware properties alone
- Add a Hardware Property for Device ram size: “512”
- Save the AVD
Here are the details of the AVD:

Step 11: Creating an AVD to Emulate the Motorola Xoom Tablet
Although the Motorola Xoom hasn’t shipped as of this writing, all of the specifications we need are readily available. As a launch device for Honeycomb, expectations are that it will be very close to the stock Android experience. This means the emulator will do a good job for most developers trying to port their apps for this device prior to its availability. However, as with any pre-release hardware, it is possible that the hardware or software details will change before release.The important specifications for this device, from an Emulator perspective, are:
- Target platform: Android 3.0 Honeycomb
- Screen info: Medium density, extra large, WXGA (1280×800)
- No keyboard
- Dual camera support
- Within Eclipse, launch the Android SDK and AVD Manager
- Select “Virtual Devices” from the left-hand options
- Click the “New” button to create a new AVD configuration
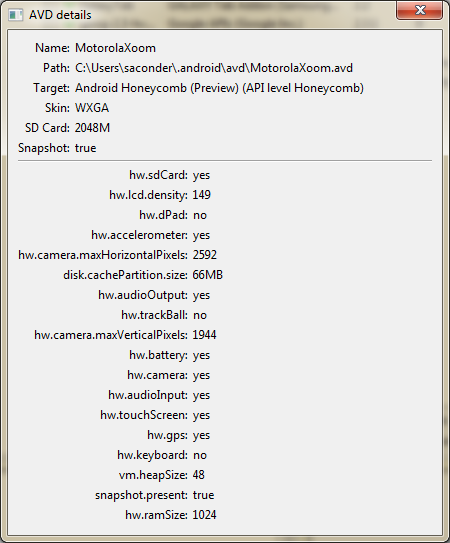
- Name the AVD: “MotorolaXoom”
- Select the Target: Android Honeycomb (as of this writing, that’s “Android Honeycomb (Preview) – API Level Honeycomb”)
- Input the SD Card Size: “2048 MiB” (or a suitable value for your uses)
- Keep the default Skin Details: “Default (WXGA)”
- Keep the default Hardware Property for Abstracted LCD Density: “149” (this will come up as medium density)
- Add another Hardware Property for Device RAM size: “1024”
- Add another Hardware Property for Keyboard Support: “No”
- Add another Hardware Property for Camera Support: “Yes”
- You can fill in a few other properties, as found at Motorola’s developer info site, see the screen shot below, too
- Save the AVD
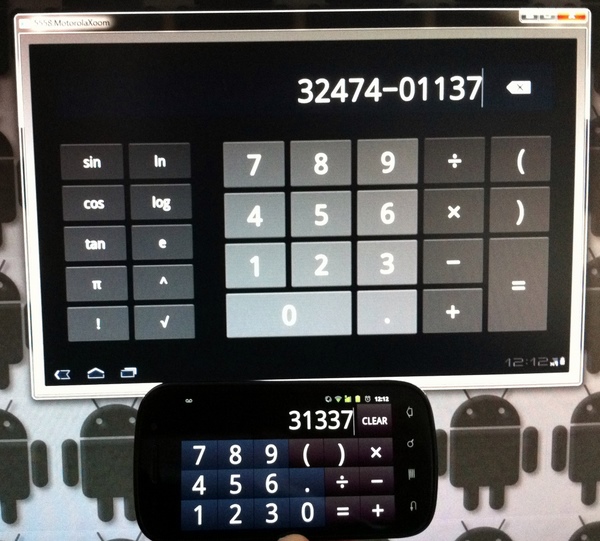
This particular AVD, and any based on the Honeycomb Preview SDK, are surprisingly slow. Google says they’re working on that in the preview notes. Let’s wish them speed and luck on getting an update out that is much faster.
The following screenshot shows the details for this AVD:


0 comments
Thanks for your comment